Curtain Fitting Guides
Not sure where to start?
Our fitting guides make it easy. Follow simple, clear instructions for each curtain style and enjoy perfectly dressed windows in no time.
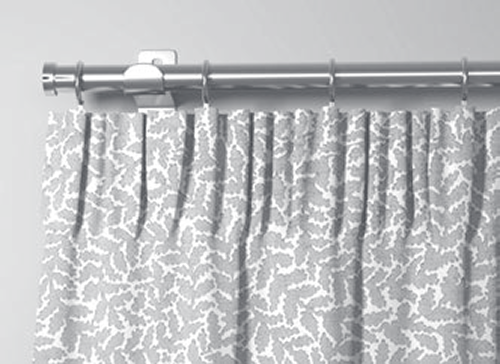
Hanging Pencil Pleat Curtains
Below is a straightforward step-by-step guide to help you prepare, gather, and hang pencil pleat curtains for a neat and professional finish.
Tools Required:
Measuring tape, Spirit level, Pencil, Drill and Screwdriver
Step 1 — Before You Start
- Before hanging your curtains, identify the left and right panel.
- If your curtains include a side seam, this should sit closest to the pole or track end once fitted.
- This ensures the curtains fall correctly and look balanced when drawn.
Step 2 — Getting Ready to Hang
- Hanging curtains is easiest with two people—one to support the curtain’s weight and one to attach the hooks.
- If working alone, rest the curtain gently over your shoulder to help manage the fabric while you work.
Step 3 — Determine Curtain Width
- Pencil pleat curtains arrive flat rather than gathered. This protects the fabric from creasing during transit and allows you to gather the pleats to your exact width.
- Note: Pencil pleat curtains do not come with hooks, so you will need to insert your own.
- For the best fullness, each curtain should cover half the pole or track width once gathered.
- If you prefer a more luxurious, fuller look, gather each curtain slightly wider than the halfway point.
Step 4 — Gathering Your Curtains
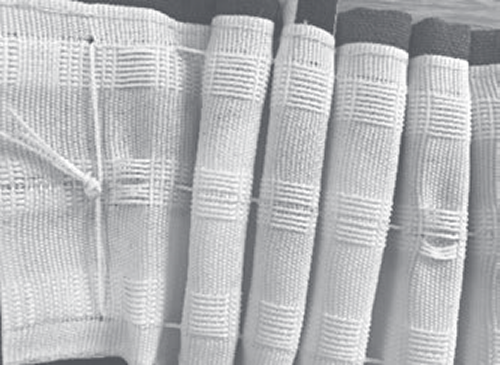
- Before gathering, knot together all cords at one end of the heading tape. This prevents the cords from pulling through while you gather. (We recommend placing the knotted end on the outer edge of each curtain.)
- Gently pull the loose cords at the opposite end until the curtain reaches your required width.
- As you gather, ensure the pleats remain even and consistent across the curtain.
- Loosely tie off the free end of the cords—never cut them.
- Tuck any excess cord neatly behind the tape for a tidy finish.
Taking time here makes a big difference to how your curtains hang.
Step 5 — Inserting the Hooks
- Count the number of rings or gliders on your pole or track.
- Divide this number by two — this is how many hooks you’ll need per curtain.
- On the back of the curtain tape, you’ll find three rows of pockets:
- Row A → For poles (curtain hangs below the pole)
- Rows B or C → For tracks (curtain sits level with the track top)
- Space your hooks evenly, around 4–5 pockets apart, depending on your required quantity.
- Always place a hook at each end of the curtain to keep the edges stable.
Step 6 — Hanging Your Curtains
- Once the hooks are in place, attach each one to your pole rings or track gliders.
- Support the curtain as you move along to prevent uneven tension or dragging.
Step 7 — Dressing Your Curtains
To help your curtains settle into smooth, tidy pleats:
- Remove creases using a steamer or an iron on a steam setting (avoid direct fabric contact).
- Pull the curtains into position, checking that the gaps between pleats are even.
- Smooth each pleat from top to bottom to help shape the heading.
- Tie the curtains loosely at the centre using soft ties, fabric strips, or the original packaging.
- Leave tied for at least 48 hours. The longer they stay dressed, the sharper the pleats will look.
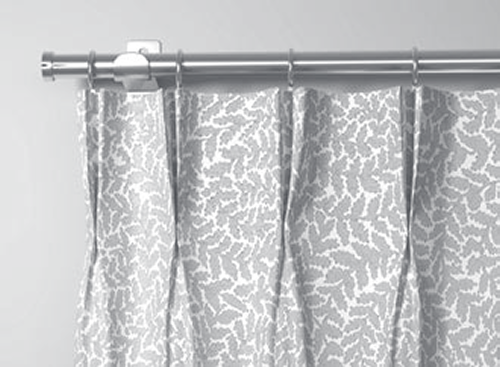
Hanging Pinch Pleat Curtains
Below is a straightforward step-by-step guide to help you prepare, gather, and hang pencil pleat curtains for a neat and professional finish.
Tools Required:
Measuring tape, Spirit level, Pencil, Drill and Screwdriver
Step 1 — Before You Start
- Lay your curtains out and identify the left and right panel. If your curtain has a side seam, this should sit closest to the pole or track end once hung.
- Doing this first helps ensure your curtains look balanced and symmetrical.
Step 2 — Preparing to Hang
- Pinch pleat curtains are easiest to hang with two people—one to support the fabric and one to attach the hooks.
- If you’re working alone, gently rest the curtain over your shoulder so you can control the weight while positioning each hook.
Step 3 — Understanding the Pinch Pleat Heading
Your curtains arrive with the pleats already sewn in and adjustable hooks attached.
This means the structure is built in, giving your curtains crisp, elegant folds once hung.
Step 4 — Positioning the Hooks
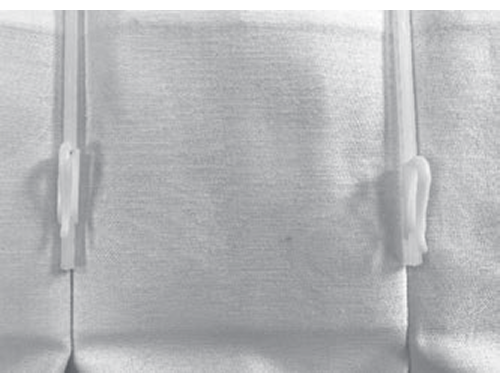
Each hook slides down the plastic retainer at the back of the curtain. They only move downward—if one goes too far, simply remove it from the bottom and reinsert at the top.
Recommended Positions:
- Hanging from a pole: Set the hooks towards the top of the retainer for a raised, polished finish.
- Hanging from a track: Position the hooks midway or lower to ensure the track stays hidden behind the fabric.
Step 5 — Hanging Your Curtains
Attach each hook one at a time onto the rings or gliders, supporting the weight of the curtain as you go.
Make sure each pleat aligns correctly with the next to keep the curtain hanging evenly.
Step 6 — Dressing the Curtains
- Remove creases using a steamer (or an iron on steam setting—avoid direct contact with the fabric).
- Shape each pleat from top to bottom, spacing them evenly with your hands.
- Tie the curtains loosely at the centre using fabric strips or the packaging ties.
- Leave tied for at least 48 hours to help the pleats set and fall naturally.
Step 7 — Final Adjustments
Once the dressing ties are removed, gently shake the curtains and smooth out any remaining folds. Take a moment to ensure each pleat sits straight and the hemline is even.

Hanging Eyelet Curtains
Below is a simple, step-by-step guide to help you prepare, gather, and hang eyelet curtains for a neat and professional finish.
Tools Required:
Measuring tape, Spirit level, Pencil, Drill and Screwdriver
Step 1 — Before You Start
- Before hanging your curtains, identify the left and right panel.
- If your curtains include a side seam, this should sit closest to the pole or track end. This ensures the curtains fall correctly and look balanced when drawn.
Step 2 — Preparing to Hang
- Hanging curtains is easiest with two people—one to hold the curtain and the other to attach it to the pole.
- If you are working alone, place the curtain gently over your shoulder to help manage its weight while feeding the eyelets onto the pole.
Step 3 — Understanding Eyelet Headings
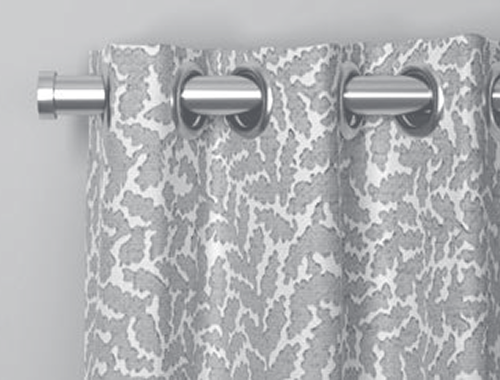
- Eyelet curtains feature circular metal or plastic rings along the top of the curtain panel.
- These rings slide directly onto a curtain pole, giving a neat, uniform look with natural pleats.
- Tip: The eyelet closest to the outside edge (finial end) should sit between the bracket and the finial. This helps keep the curtain ends in place when closed.
Step 4 — Preparing to Hang
Before hanging, gather the curtain into a gentle pleated bunch, with the outside edges pointing backwards (toward the window).
This will make it easier to feed the eyelets over the pole smoothly.
Step 5 — Hanging the Curtains
- Starting at one end, feed each eyelet onto the curtain pole.
- Ensure the curtain moves freely along the pole.
- Check that the outermost eyelets are correctly positioned between the finial and the bracket for stability.
Step 6 — Dressing the Curtains
- Remove creases using a steamer or an iron on a gentle steam setting (avoid direct contact with the fabric).
- Pull the curtains back and check that the pleats are evenly spaced; the fabric will naturally fall into pleats over time.
- Smooth each pleat from top to bottom to shape the heading.
- Tie the entire curtain loosely at the centre using soft fabric strips, packaging, or tiebacks.
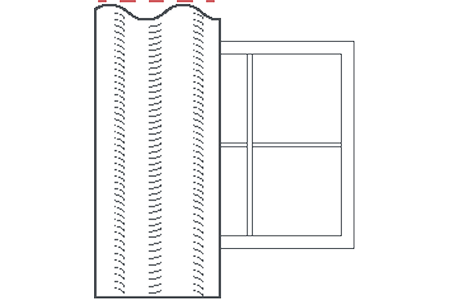
Hanging Wave Curtains
Below is a step-by-step guide to help you hang wave curtains for a professional, smooth finish.
Tools Required:
Measuring tape, Spirit level, Pencil, Drill and Screwdriver
Step 1 — Before You Start
- Before you begin, ensure the screws provided are suitable for your wall or ceiling surface. Some surfaces may require wall plugs or different fixings.
- Check the area around your window for obstructions, such as handles, to make sure your curtains will operate smoothly.
Step 2 — Positioning Your Brackets
Outside the Recess
1. Curtain Height
Hold one curtain up to the window to establish the top and bottom position of the curtain. Use a pencil to mark the top of curtain on the wall. Place the curtain neatly to one side.
2. Track Position
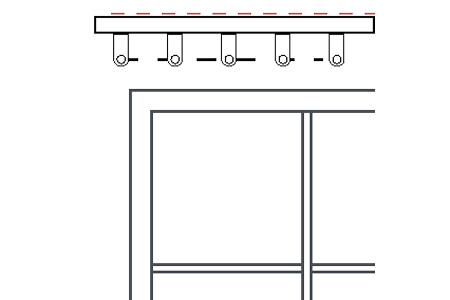
Position the track against the wall so the hole in the carrier is level with the marks in Step 1. Mark the top of the track and use a spirit level to mark a straight line across your wall. You will fit your brackets along this line.
3. Track Positions
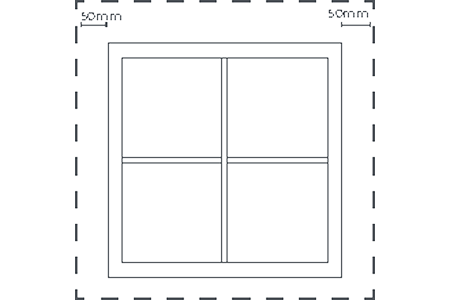
The brackets need to be positioned 50mm in from each side of the track. Using your tape measure, measure and mark these points with a pencil. Additional brackets should be spaced evenly between the two ends.
4. Fix the Brackets
It is recommended to fit your brackets into your wall via a face fixing. Hold the brackets to the pencil marks in Step 3. Mark the relevant hole with a pencil. Drill the holes and use suitable fixings to fix the brackets.
Positioning for Inside The Recess
1. Measure
The brackets should be positioned 50mm in from each side of your recess. Using your tape measure, mark these points with a pencil. Evenly space additional brackets between the two end points.
2. Fix Brackets
To fit inside the recess you will need to top fix the brackets. Hold the brackets to the marks made in Step 1 and mark the relevant hole with a pencil. Drill the holes and use suitable fixings to fix the brackets in place.
Step 3 — Fitting the Track and Curtain
- Unscrew the gold screw beneath each bracket slightly to allow the cantilever to move.
- Angle the track into the bracket and slide it into the cantilever.
- Snap the track into place and tighten the gold screw to secure it.
- Ensure the runners are evenly distributed along the track.
Step 4 — Hanging Your Curtains
- Starting from the outermost hook, slide the hooks attached to the curtain tape onto the runners along the track.
- Make sure the hooks move freely and the curtain fabric falls evenly.
Step 5 — Dressing Your Curtains
- Remove creases using a steamer or iron on a gentle steam setting. Avoid direct contact with the fabric.
- Pull the curtain along the track to allow the fabric to fall into its natural wave shape.
- Smooth each wave gently from top to bottom to help retain the form.
- Tie the curtains loosely at the centre using soft fabric strips or tiebacks.
Maintenance
- Dry clean only.
- Avoid direct contact with the iron while steaming.
- Re-dress curtains occasionally to maintain wave formation.